Untethered Recordings Using Datalogging Headstages
Overview
Some of the Brainwave headstages have the ability to
record neural data directly onto an SD card on the headstage. This
allows completely untethered operation, which can enable a wide range of
experiments that are not practical with tethers. However, this creates
an issue: if the neural signals are recorded on the headstage, how can
we now correlate those signals to events in the environment (lever
presses, beam breaks, video, lights, sounds)? During tethered recording,
we combine such signals with the neural recording and timestamp video
frames as data are collected. But during untethered recordings, the
environmental record is recorded separately and must be registered with
the neural data on the SD card after the recording has finished. Here we
cover the main things to consider and how to use the Trodes toolbox to
perform critical operations. 

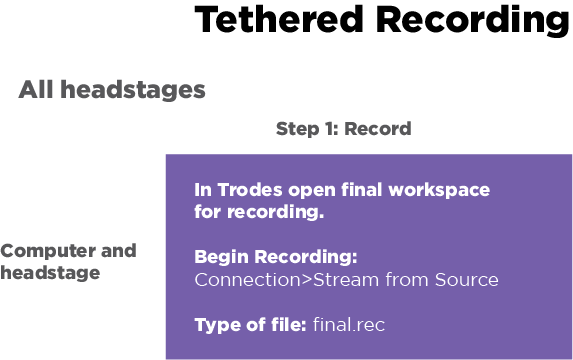
tethered_diagramai.png
Synchronization
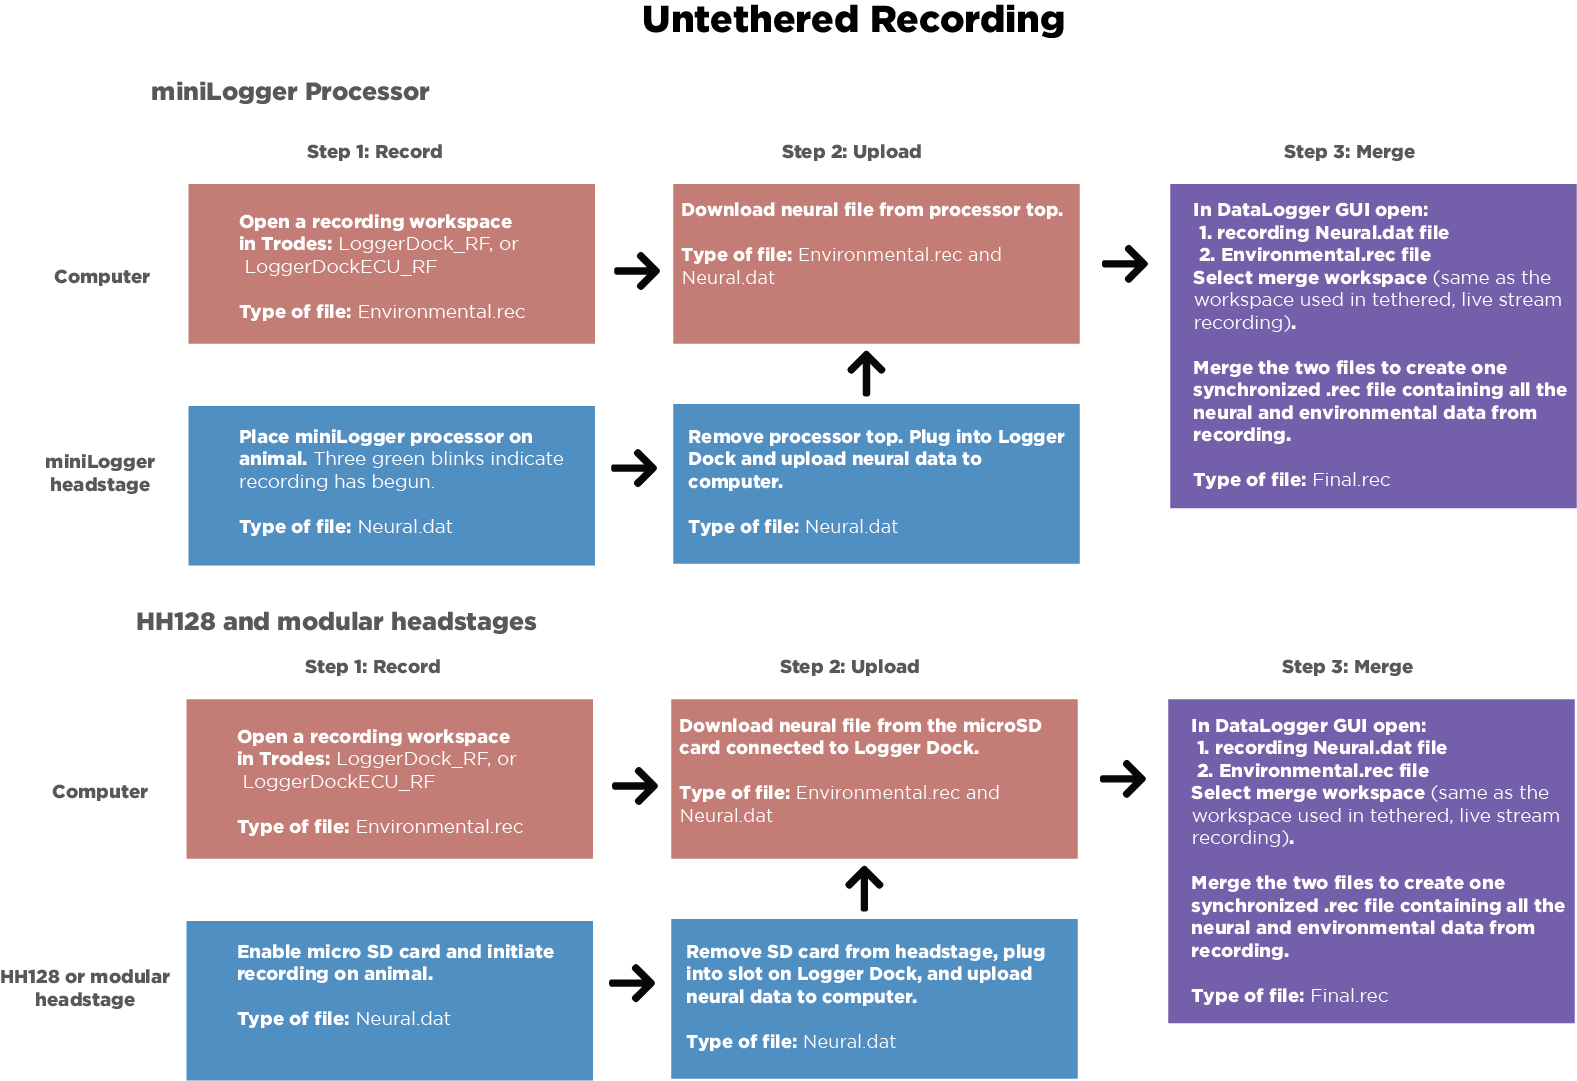
Synchronization between the environmental record and the data recorded on the headstage depends on a radio signal that is sent to the headstage at regular intervals (most setups use a 10-second interval). This signal originates from Brainwave hardware (there are multiple options) that also acquires environmental data and connects to your computer. Trodes connects to this hardware to display and save the environmental data during the recording session. If you need video, the camera module is used the same way you would during tethered recordings. You will not have access to the neural data during the recording. After the recording session is done, you will have two files: one on the headstage SD card and one on the computer. These two files will be aligned and merged using the synchronization signals that were recorded in both files.
Recording
During a data logging session, Trodes needs to be configured to record only environmental information and no neural channels. To do this, a workspace configured for 0 neural channels must be created. Start Trodes and click on Create/Edit Workspace on the start menu. Then choose From Scratch. This will open up the workspace editor. In the General Settings tab, you must change the number of channels from 32 to 0. If your MCU or Dock is configured to sample at 20 kHz instead of 30kHz, you must enter 20000 for Hardware Sampling Rate. Lastly, if you have an ECU connected to you MCU or Dock, you must add it as a device in the Hardware Devices section. Then, you can save the workspace by clicking as the Save as button. In future sessions, you can open this workspace from the start menu by clicking on the Open Workspace button. If you are using an MCU as the controller, make sure that the Brainwave radio transmitter is plugged into the correct auxiliary slot in the front of the MCU. See the hardware manual for more details. Once you have opened up the 0-channel workspace, connect to the MCU or Dock using a USB connection. Next, power on the headstage and make sure that the lights on the headstage indicate that it is ready to start recording. You are now ready to start the session. When you start acquiring data in Trodes, the MCU will send a “start” signal to the headstage to start recording. Next, create a new recording file from the Trodes menu and start recording. When the recording session is complete, stop the recording in Trodes and close the .rec file. Then, stop acquisition (this will also stop the headstage recording) and power off the headstage. At this point the .rec file on the computer will contain the environmental record. The SD card on the headstage will contain the neural data. Note: the SD card on the headstage will be locked from further recording in order to protect the existing recording from accidental erasing. After data has been transferred to the computer, the card must be enabled for recording again using the transfer utility.
Transferring Data to Computer and Merging Files
To merge to the two files into a single .rec file, you will need three files: 1) The file from the SD card recording, 2) the .rec file containing the environmental record, and 3) a workspace to append to the merged file. The workspace should be the same workspace you would have used if the recording was performed in tethered mode. Note: this is NOT the same workspace you used to collect the environmental record. We provide a graphical utility to perform the operations of transferring data from the SD card and merging the two files here: Data Logger GUI
Getting Started First-time steps to set up data logging:
Plug the RF Sync dongle into the Aux 1 port in the front of the MCU, connect the ECU to the MCU, and connect the MCU to the computer via USB. Do not connect the headstage to the MCU. Turn the MCU and ECU on. If you do not have an ECU, ignore the ECU part.
Open up Trodes with your 0-channel workspace (see above). Connect to the MCU or Dock in the connection menu, and start streaming data. On the Aux tab, you should see the inputs streaming to the screen.
Once you have verified that streaming from the MCU works ok, stop streaming (Connection->Disconnect).
Insert an SD card into the headstage that is configured for the correct number of channels. If the card is not yet configured (new card), you will need to add the configuration to the SD card using the Write Config feature of the DataLogger GUI using the correct config file. If you have already done a recording using the SD card, make sure to re-enable it for recording using the DataLogger GUI. Plug the charged battery into the headstage. The headstage will power on and the orange light should go solid on (indicating that it is waiting for the start signal from the MCU). If the red light is flashing, it means that the SD card is not enabled for recording or that there is no config file on the SD card.
In Trodes, start streaming again. This should send a radio command to the headstage to start collecting data. The orange light should turn off on the headstage.
In trodes, create a file to save the environmental data and start recording (like you do during tethered recordings).
Collect 1-2 minutes of data, then end the environmental recording in Trodes.
Stop streaming from the MCU (Connection->Disconnect). The orange light should turn back on on the headstage indicating that it is paused.
Unplug the battery from the headstage and remove the SD card.
Plug the SD card into the Brainwave docking station and use the Data Logger GUI to download the data from the SD card and merge the data with the environmental record you just recorded. The merge workspace should be the same workspace you have been using during tethered recordings.
Play back the merged file in Trodes to make sure that you used the correct workspace.